Custom dialog boxes: Part 5 of 5 on popup windows
Learn how to create your own custom dialogs using Acrobat 6 or later.
By Thom Parker – October 7, 2006


Scope: Acrobat Professional 6 or later
Skill Level: Advanced
Prerequisites: Familiarity with the Acrobat JavaScript environment
All the standard Acrobat JavaScript popup windows (or dialogs) are intended for specific purposes, the Alert Box, the Response Box, the file browser dialogs, and all the others not covered in this series of tips. These dialogs are easy and quick to code and some, like the file browsers, provide functionality not found anywhere else in the Acrobat JavaScript environment. However, it would be impossible for Acrobat to provide for every possible popup dialog a user might need. For this reason, Acrobat 6.0 introduced a method for creating custom dialogs.
All examples for this tip are available in the following PDF file.
Download [PDF, 24 KB]
Custom Dialogs (Advanced Topic)
If none of the built in dialogs will do, then custom dialogs are the answer. They can display many different kinds of controls (text boxes, check boxes, lists, images, etc) in just about any configuration. This is useful for a variety of applications such as creating custom alert boxes, splash screens, and complex input panels. However, this flexibility and power come with a price. Custom dialogs are among the most complex structures to program in Acrobat JavaScript and require a good knowledge of the core JavaScript language. In this tip, we’ll look at just the basics of setting up and using custom dialogs.
There are two parts to creating a custom dialog- the dialog’s definition and the dialog’s activation (displaying it to the user). The dialog definition is a JavaScript Object. This object is hierarchical and contains entries enumerating all of the dialog’s parts and their appearance and behavior. The dialog is activated by passing the Dialog Object into the app.execDialog() function.
Here’s an example of a dialog that simply displays the words “Hello World.” Run this code from the JavaScript Console. The result for Acrobat 7.0 on the Windows OS is shown in Figure 1.
// Dialog Definition
var oDlg = {
    description: { name: "Test Dialog", elements: [
    	{ name: "Hello World", type: "static_text", },
    	{ type: "ok", },
    ] }
};

// Dialog Activation
app.execDialog(oDlg);
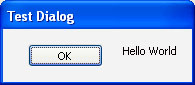
Figure 1 – Very simple custom dialog, one static text field and one OK button.
The complex part of creating the dialog is creating the Dialog Object. In this example 19 lines are used to display two words of text, something that could be done in a single line with the app.alert() function. The power of custom dialogs is in their ability to do things that can’t be done with the standard built-in dialogs, like displaying custom icons and creating complex input panels. Examples of complex dialogs can be seen at:
www.windjack.com/.../DialogUses.pdf
The key to understanding these dialogs is in understanding how the arrangement of the Dialog Object structure controls the arrangement of elements on the dialog. A good analogy is boxes arranged inside of other boxes. Elements like buttons, icons, and static text are placed inside of containers. These containers can then be placed inside of other containers. The top level container is the dialog itself. In the Dialog Object this is represented by the description property. Inside this property is an array of child elements. Each child is a JavaScript Object with a set of properties defining what kind of element it is (the type property) and how the element will look and behave. The name property holds the text displayed in the static text element. This is true for every element type that displays some kind of text.
There isn’t any placement or size information in the Dialog Object for the previous example, yet the text and the button are perfectly visible. Acrobat automatically sizes these containers, and the dialog, to be large enough to fit all of their contents. The dialog definition can include size information to set the element size, but there is no exact placement information. The element arrangement on the dialog is relative.
Elements are arranged inside a container either top to bottom or left to right. The default is top to bottom. The order of the elements matches the order of the Dialog Object. This seems to run exactly counter to the results of the first example where the elements are arranged left to right and the order is opposite of that in the Dialog Object. This is an aberration because the elements are not inside a proper container. In the following code a third element is added, the OK button is replaced with an OK/Cancel button combination, and they are all placed in an invisible container (Figure 2).
// Dialog Definition
var oDlg = {
    strName: "", initialize: function(dialog) {
        dialog.load({"usnm":this.strName});
    },
    commit: function(dialog) {
        var data = dialog.store();
        this.strName = data[ "usnm"];
    },
    description: {
        name: "Test Dialog", elements: [ {
            type: "view", elements: [
                { name: "Enter your name:", type: "static_text", },
                { item_id: "usnm", type: "edit_text", char_width: 15 },
                { type: "ok_cancel", },
            ]
        },]
    }
};

// Dialog Activation
oDlg.strName = "Larry";
    if( "ok" == app.execDialog(oDlg)) {
    console.println("User Name:" + oDlg.strName);
}
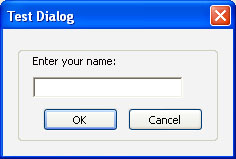
Figure 2 – Custom dialog with properly arranged elements
The new element added to this example is a text edit box. This element has two properties we haven’t seen before char_width and item_id. Since the edit box doesn’t have any content, Acrobat will automatically set it’s width to zero. The char_width property forces the edit box to be a minimum of 15 characters wide. The item_id property uniquely identifies the element so its data can be set and acquired from code inside the Dialog Object.
The container element has the type "view". There are two kinds of container elements, "view" and "cluster". The "view" type is invisible, whereas the "cluster" type has a visible border and caption text. Replace "view" with "cluster" in the example and add a name property to it. The result is shown in Figure 3.
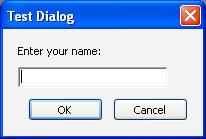
Figure 3: Using a "cluster" instead of a "view" container
Setting and getting dialog data are two of the most important dialog operations, but they can only be done while the dialog is active. The Dialog Object is allowed to have one initialize function, where the data in dialog elements is set when the dialog is first activated, and one commit function, where element data is acquired when the user presses the OK button. The actual setting and getting of data is done with the dialog.load() and dialog.store() functions, respectively. These functions can be called at any time by scripts inside the dialog. In the following code the previous example is upgraded to initialize and return the edit box text.
// Dialog Definition
var oDlg = {
	strName: "", initialize: function(dialog) {
	    dialog.load({"usnm":this.strName}); },
        commit: function(dialog) {
              var data = dialog.store();
              this.strName = data[ "usnm"];},
        description: { name: "Test Dialog", elements: [
        	{ type: "view", elements: [
        		{ name: "Enter your name:", type: "static_text", },
				{ item_id: "usnm", type: "edit_text", char_width: 15 },
				{ type: "ok_cancel", },
			] },
		] }
};

// Dialog Activation
oDlg.strName = "Larry";
if( "ok" == app.execDialog(oDlg)) {
    console.println("User Name:" + oDlg.strName);
}
The dialog this code creates looks exactly the same as the dialog in the previous example, Figure 2. The difference is that this dialog can load data into the edit box and save the data the user entered. To accomplish this, changes were made to both the definition and activation parts of the script. Let’s look at the activation part first.
The first line of the activation code sets the Dialog Object property oDlg.strName. This variable is the connection between the activation code and the value of the edit box. The first line uses it to set the initialization value of the edit box.
The next line displays the dialog and tests the return value. This return value is the result of the user pushing either the OK or Cancel buttons. We are only concerned with the user pressing the OK button. Otherwise, changes made on the dialog are discarded.
The third line of code prints the value entered in the edit box to the JavaScript Console. It does this by accessing the same oDlg.strName property used to initialize the dialog, except this time, its being read instead of written.
To make this scheme work three things have been added to the Dialog Object, the strName property, the initialize function, and the commit function. The strName parameter is used exclusively to transfer data in and out of the dialog. When the dialog is first activated the initialize function transfers the data in strName to the edit box. When the user presses the OK button, the commit function transfers data in the edit box into strName.
The initialize function contains this single line of code which maps the strName parameter into the edit box
dialog.load({"usnm":this.strName});
The dialog.load() function maps values into the elements on the dialog. Its input argument is a single JavaScript Object where each property is named for the item_id of an element on the dialog and the property’s value is the elements value. If an element does not have an item_id property, its value cannot be set by the dialog.load() function. Values are not limited to simple data types like numbers and strings, some elements, such as images and lists, require objects as input.
The commit function is exactly the opposite of the initialize function. It transfers the edit box value into the strName parameter using the dialog.store() function. The first line of the commit function
var data = dialog.store();
acquires all of the dialog element values and puts them into an object exactly like the one used as input by the dialog.load() function. The data for a specific element is found in the object property with the same name as the element’s item_id property. The second line of the commit function
this.strName = data["usnm"];
applies the edit box value to the strName variable.
The two parts to creating a dialog, definition and activation, do not have to happen at the same time. In fact, it’s preferred that the dialog only be defined once, and then activated as many times as necessary from a different location. In a PDF document this usually means placing the dialog definition code in a Document Script and the activation code in an event script for a button or other form field object.
There is much, much more to custom dialog boxes. This tip has tried to cover only the core information about how to set up and activate a dialog, and how to move data in and out of a dialog.
Related topics: |
JavaScript |
Top Searches: |
Edit PDF create PDF Action Wizard |
Try Acrobat DC
Get started >
Learn how to
edit PDF.
Ask the Community
Post, discuss and be part of the Acrobat community.
Join now >
2 comments
Comments for this tutorial are now closed.
Thom Parker
4, 2015-06-11 11, 2015Jon, Thank you for the feedback, however there are lots of quotes. Where exactly are you seeing the issue. The incorrect quote could have also been introduced when the code is copied. One common issue we see with scripts on web pages is that users copy them into a word processor first, which has the affect of converting some punctuation into non-ASCII characters.
jon brooke
3, 2015-06-10 10, 2015Looks like typographic quotes used in stead of plain text quotes in the code per Thom’s comment: ” not “
Thom Parker
9, 2014-09-15 15, 2014Derek,
You can’t have spaces in an item name in an object, i.e. - NO EXCEPTIONS TAKEN - has to be quoted, as well as all the other item names. This is the syntax error.
Derek Ziemer
3, 2014-09-15 15, 2014Thom:
I have your book and I have a problem, much related to John’s prior question, RE: object dialog box and the use of the script in the book. While I understand it and believe to have entered it correctly, I am unable to make the hidden text field calculation stick due to an error message right off the bat. The error displayed is “SyntaxError: missing : after property id 2: at line 3” which is “var dlg = {” I don’t see a means that I can change this to make it not error and this is the format used throughout your book. Please advise.
var oList = { NO EXCEPTIONS TAKEN: -1, REJECTED - SEE REMARKS: -1, RECEIPT ACKNOWLEDGED: -1, ACCEPTED EXCEPT AS NOTED: -1, AMEND AND RESUBMIT: -1, RESUBMIT FOR RECORD: -1};
var dlg = {
initialize: function(dialog)
{ dialog.load({lst1:oList});},
commit: function(dialog)
{ this.oSelect = dialog.store() .lst1;},
description:
{
name:“Review Action”
elements:[{type:“view”, elements:[
{type:“static_text”, item_id:“stat”,
name:“Select an Item”},
{type:“popup”, item_id:“lst1”, char_width:6},
{type:“ok”}]}]
}
};
Thom Parker
6, 2014-02-27 27, 2014Robert, You’ll need to more clearly explain what it is you want to do. Please keep it to a single focused topic. There is no need to post any of your existing code. Please post to the regular JavaScript forum here at AcrobatUsers.
One of the problems with your code is that the “item_id” is too large. The value of the “item_id” must be 4 characters, and only 4 characters.
Now, in general, the code you have posted is somewhat overly complex. Ok, it’s a lot overly complex and convoluted. May I ask where you got the template for creating it? You could benefit from some new videos I’ll be putting up at www.pdfscripting.com this week on this very topic.
Robert
7, 2014-02-24 24, 2014Hi, I hope I’ll still have some help here… I’m just starting to use this dialog Object and I’ve seen complex objects and I understand very well how they work… There’s still some things I am wondering how to do though.
I realized we can’t use the ‘Other’ or ‘Help’ button without using the ‘ok’ button.. which is a little annoying.. I am trying to make a button with a ‘?’ inside to show an alert message to the user to give additional information regarding the title by its side. I tried using a ‘ok’ button but it doesn’t seem to be working… Although I tried using a link_text and checkbox but it’s also not working. Here is how my dialog looks like:
function dialog()
{
var dialogDescriptor =
{
description:
{
name: “Background Dialog”,
elements: [
{
type:“view”,
align_children: “align_row”,
elements: [
{
type: “static_text”,
name: “Create the background with the following choices:”,
}
]
},
{
type:“view”,
align_children: “align_row”,
elements: [
{
width: 100,
height: 22,
type: “check_box”,
name: “Objective”,
item_id: “chkObjective”,
},{
type: “link_text”,
name: “?”,
item_id: “infoObjective”,
},
]
},
{
type: “view”,
align_children: “align_row”,
elements:[
{
width: 100,
height: 22,
type: “check_box”,
name: “Context”,
item_id: “chkContext”,
},{
type: “link_text”,
name: “?”,
item_id: “infoContext”,
},
]
}
]
},
initialize: function(dialog)
{
dialog.load(
{
“chkContext”: dialogObject.chkContext,
“chkObjective”: dialogObject.chkObjective,
“infoObjective”: dialogObject.infoObjective,
“infoContext”: dialogObject.infoContext,
}
);
dialog.enable(
{
“chkContext”: true,
}
);
dialog.visible(
{
“chkContext”: true,
}
);
},
validate : function(dialog)
{
//add validate code here
return true;
},
commit: function(dialog)
{
var elements = dialog.store();
dialogObject.infoObjective = elements[“infoObjective”];
},
“infoObjective”: function (dialog)
{
//var infoObjective = dialog.store();
app.alert(“You just clicked information for Objectives.”);
},
“infoContext”: function (dialog)
{
var infoContext = dialog.store()[“infoContext”];
},
};
var dialogObject =
{
infoObjective: ({}),
infoContext: ({}),
execDialog: function() { return app.execDialog(dialogDescriptor); },
};
return dialogObject;
}
var d = dialog();
d.execDialog();
Do you think someone can help me with this?
Thom Parker
5, 2013-11-25 25, 2013Hello John,
There are a number of issues with the code shown above. The first is that the list element name is “lst1” not “1st1”. You’ll note that the first letter is an “L” not a number 1. Leading numbers can cause problems in variable names. The next issue is that the quotes used in the code are not plain ASCII quotes. It looks as if this code was entered from a word processor, instead of a plain text editor. Fix these two issues, and if you have further issues, then please post to the forums.
John
11, 2013-11-22 22, 2013I go the book “all about Stamps” In the appendix, I was trying to input the Object dialog text shown here.
var oList = {A:-1,B:-1,C:-1};
var dlg = {
initialize: function(dialog)
{ dialog.load({1st1:oList}); },
commit: function(dialog)
{ this.oSelect = dialog.store().1st1; },
description: { name:“Stamp”, elements: [ { type: “view”, elements: [ { type:“static_text”, item_id:“stat”, name:“Select”}, {type:“popup”, item_id:1st1”, char_width:6}, {type:“ok”}]}]
}
};
if(event.source.forReal &&
(event.source.stampName == “#_UInHg3GyeWkrusx5NkxMD”))
{
if(“ok” == app.execDialog(dlg))
{
var cRtn = “Off”;
for(cRtn in dlg.oSelect)
if(dlg.oSelect[cRtn] > 0) break;
this.getField(“Stamp”).value = cRtn;
}
}
I could not get it to run in the calculate text box for the dynamic stamp. Kept giving me an error at line 5.. I copied straight out of the book. Can you help?
Comments for this tutorial are now closed.